
Natural solutions often outshine their chemical-laden counterparts in the quest for healthier, stronger hair. One such gem in the realm of natural hair care is castor oil. Renowned for its remarkable properties in promoting hair growth, moisturizing the scalp, and strengthening hair strands, castor oil makes an excellent ingredient for homemade shampoo. Making castor oil shampoo at home is a simple and cost-effective way to promote healthy hair growth and nourish your scalp. This article provides a simple, easy-to-follow recipe to create castor oil shampoo, bringing nature’s essence to your hair care routine.
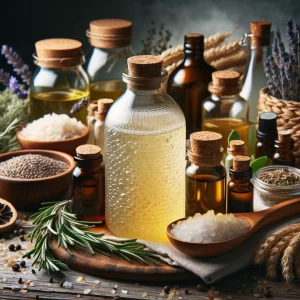
Ingredients
- Castor Oil: It is renowned for fortifying hair, hydrating the scalp, and encouraging hair development. About two teaspoons of castor oil will be required.
- Liquid Castile Soap: A mild, all-natural cleaner derived from vegetable oils. It functions as your shampoo’s foundation. About half a cup of liquid castile soap will be required. Depending on your desire, you can select both scented or unscented.
- Essential oils: They improve your hair and scalp and add scent to your shampoo. Essential oils that are ideal choices are; Tea tree oil (which fights dandruff), Rosemary (which stimulates hair growth), and Lavender (which soothes). Apply ten to fifteen drops of your chosen essential oil(s).
- Distilled Water: To dilute the shampoo and make it simpler to apply, you’ll need around 1/4 cup of water.
Equipment
The tools included are for creating homemade castor oil shampoo; each has a distinct function. Below is a description of every item:
- Mixing Bowl: A mixing bowl is used as a container to combine and mix all the ingredients of your homemade castor oil shampoo. It provides a space to blend the liquids and other components easily.
- Whisk or Spoon: A whisk or spoon is used for stirring and mixing the ingredients in the mixing bowl. It ensures that all the ingredients are thoroughly combined, creating a uniform mixture for your shampoo.
- Measuring Spoons: Measuring spoons are used to accurately measure and add specific amounts of ingredients, such as castor oil, honey, and essential oils, to the mixing bowl. This helps you maintain the right proportions for your shampoo.
- Squeeze Bottle or Shampoo Dispenser: A squeeze bottle or dispenser stores and dispenses your homemade castor oil shampoo. Once you’ve mixed your shampoo in the mixing bowl, you can use the funnel (if needed) to transfer it into the squeeze bottle or dispenser. These containers make applying shampoo to your hair and scalp easy during use.
- Funnel (Optional): A funnel is an optional tool that can be used to pour the mixed shampoo into the squeeze bottle or shampoo dispenser without spilling or making a mess. It helps guide the liquid into the container more smoothly and precisely.
Instructions for Making
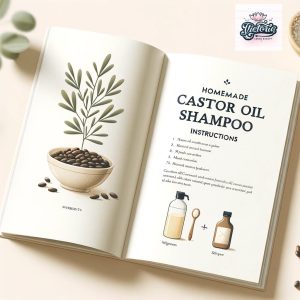
- Base Setup: Start with a gentle shampoo to get things going. This shampoo will act as the foundation for your DIY creation. Transfer the necessary quantity of shampoo into a mixing basin.
- Add Castor Oil: Stir the castor oil into the shampoo-filled mixing basin. Thoroughly combine it with the shampoo base. One crucial component that is well-known for nourishing hair is castor oil.
- Essential Oils: Choose your favorite essential oils to infuse your hair and scalp with extra benefits beyond smell. To the mixture in the mixing bowl, add the selected essential oils.
- Modify Coherence: You should change the shampoo’s consistency or thickness to suit your tastes. You can add distilled water to thin the mixture to the desired consistency. You can personalize the shampoo at this stage according to your preferences.
- Include honey: Add a spoonful of honey to the mixture for extra moisture and nutrition. One natural humectant that might help your hair retain moisture is honey.
- Mix Everything: Make sure Everything is well combined in the bowl, including castor oil, honey, essential oils, distilled water, and shampoo. By distributing the ingredients uniformly, this stage guarantees that the shampoo is well-blended.
- Convey to Bottle: Use a funnel (optional) to gently transfer the shampoo mixture into a dispenser or squeeze bottle to make the shampoo easier to use and distribute. This container will make and apply your DIY castor oil shampoo.
- Label: It is important to remember to identify your homemade shampoo, mainly if you have included certain essential oils or other components to make it unique. To ensure that you utilize a product appropriately, proper labeling lets you identify the product and its components.
Usage Tips
- Shake well before each use: Over time, the ingredients in your homemade castor oil shampoo may settle or separate, with heavier components like the castor oil potentially sinking to the bottom. To ensure that the shampoo is adequately mixed and all ingredients are well-blended before application, it’s essential to shake the bottle or dispenser vigorously before each use. This ensures that you get a consistent and even distribution of all the beneficial ingredients in your shampoo.
- Perform a patch test: Before using your homemade shampoo on your entire scalp and hair, performing a patch test is a good practice. Apply a small amount of the shampoo to a small area of your skin (typically the inside of your forearm or behind your ear) and leave it on for a short period, such as 24 hours. This helps you determine if you have any allergic reactions or sensitivities to the ingredients in the shampoo. Discontinue use immediately if you experience redness, itching, or other adverse reactions.
- Store in a cool, dry place: To maintain the quality and effectiveness of your homemade castor oil shampoo, it must be stored properly. Store the bottle or dispenser in a cool, dry place, away from direct sunlight and moisture. Excessive heat and humidity can affect the ingredients’ stability and the product’s overall quality. Additionally, it’s recommended to use the shampoo within a month or a reasonable timeframe to ensure its freshness and potency. Homemade products may not have the same preservatives as commercial ones, so using them promptly helps maintain their efficacy.
Benefits of Castor Oil in Shampoo
- Enhances hair growth due to ricinoleic acid: Ricinoleic acid helps improve blood circulation to the hair follicles, which in turn can stimulate hair growth.
- Moisturizes and soothes the scalp: A well-moisturized scalp is essential for maintaining healthy hair and reducing the risk of dandruff and itching.
- Strengthens hair, reducing breakage: Regular castor oil in shampoo can help fortify the hair strands, making them less prone to breakage and damage.
- Adds Shine: Your hair will appear healthier and more vivid with a natural shine that castor oil may give it.
- Reduces Frizz: Reducing frizz and taming flyaways makes your hair smoother and easier to maintain.
- Prevents Split Ends: Castor oil helps lessen the likelihood of split ends and hair breakage by fortifying the hair shaft.
- Cleanses Scalp: Its cleaning qualities aid in clearing the scalp of debris, extra oil, and product buildup, fostering a more hygienic and pleasant environment.
- Hair Conditioning: By acting as a deep conditioner, castor oil leaves your hair feeling silky, smooth, and more straightforward.
- Nourishes Hair Follicles: It nourishes hair follicles, encouraging the development of stronger, thicker hair.
- Natural Ingredient: Since castor oil is a natural substance free of chemicals, it is a gentle choice for various hair types, including sensitive scalps.
Homemade vs. Store-Bought: What is the Difference?
 VS.
VS.
The choice between commercially available shampoos and natural, handmade hair care solutions is still being determined. Here is a thorough comparison of conventional shampoos and homemade castor oil shampoo to help you weigh the advantages and disadvantages of each:
Transparency of Ingredients:
- Homemade: You are in total control of what goes into it. This openness guarantees that your hair won’t be exposed to harsh chemicals or unidentified substances.
- Commercial: Long ingredient lists with complicated chemical names are familiar. Customers concerned about their health may be concerned about some of these, including harsh sulfates, parabens, and artificial perfumes.
Expense-effectiveness:
- Homemade: Buying components like castor oil in bulk may make your shampoo more affordable in the long term.
- Commercial: There is a wide variety of prices; however, certain specialized or high-quality shampoos can be pricey.
Efficacy:
- Homemade: Castor oil-based shampoos, for example, can have varying degrees of efficacy. Nonetheless, they’re good for strengthening hair and lowering exposure to harmful chemicals.
- Commercial: They are designed to clean hair effectively and include active substances for various hair problems, such as color protection, dandruff, and hair fall.
Customization Options
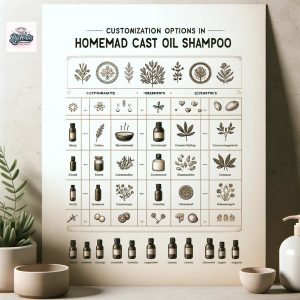
There is no one-size-fits-all approach to personal hair care. That’s where personalization shines, particularly when it comes to handcrafted goods like castor oil shampoo. You may customize your castor oil shampoo in several ways to meet your unique hair requirements and preferences.
Essential Oils for Aroma and Benefits:
- For Relaxation and Scalp Health: Lavender oil is well-known for its capacity to relax the scalp, lessen dandruff, and add a peaceful aroma.
- For Dandruff Control: Tea tree oil is a fantastic option because of its antifungal qualities, which successfully fight dandruff.
- For Strengthening Hair: Rosemary oil helps fortify hair follicles and promote growth.
- For Extra Moisture: Ylang-ylang oil helps to boost hair oil production, which lessens dryness and breakage, making it an excellent choice for dry hair.
Herbal Infusions for Specific Hair Concerns:
- For Strength and Shine: Aloe vera gel’s hydrating and strengthening qualities can be included in the shampoo.
- For Hair development: Infusions of peppermint or nettle can stimulate the scalp, encouraging hair development.
- For Calming Sensitive Scalp: Chamomile tea is an excellent gentle and calming addition for those with sensitive scalps.
Carrier Oils for Various Types of Hair:
- For dry hair: You can apply extra virgin olive or coconut oil to your hair to help hydrate and nourish it.
- For greasy Hair: A lightweight solution that doesn’t burden greasy hair is grapeseed oil.
- For Normal Hair: Jojoba oil is a flexible option that harmonizes with the natural oils in hair.
Natural Additives for Enhanced Effects:
- For Added Nourishment: You may add glycerin or honey to your shampoo to give it a smoother texture and more moisture.
- For Better Texture: You may use xanthan gum or natural guar gum as thickeners if you like a thicker shampoo.
Changing the Base Shampoo:
- You can use an organic, sulfate-free shampoo as your basis, depending on your taste for a more natural product.
- For people with sensitive skin or scalps, this decision is quite crucial.
Precautions and Considerations
Although using homemade castor oil shampoo might be a healthy and all-natural option for hair care, there are a few things to keep in mind to ensure its safe and efficient use. The following are essential things to remember:
- Test for Allergies: Do a patch test before adding castor oil or any other new ingredient to your shampoo. Test for allergic responses by applying a small quantity to your inner arm and monitoring it for a whole day to look for redness, itching, or swelling.
- Ingredient Quality: Always use pure, premium castor oil and other substances. Lower-quality products may contain additives or impurities that cause hair damage or rashes on the scalp.
- Castor oil concentration: Due to its thickness, castor oil may feel heavy on hair. Use it sparingly, especially if you have fine or oily hair, to prevent weighing it down or making it greasy.
- Pregnancy and Health Issues: Before incorporating castor oil into your hair care regimen, see a doctor if you are expecting or have any medical issues. There may be contraindications to this use of castor oil.
- Sensitivity to Scalp: Castor oil may be overly thick or unpleasant for certain people’s scalps. Stop using it immediately if you feel pain, irritation, or redness.
Final Thoughts
As we wrap up this comprehensive guide on making your castor oil shampoo, here are some key takeaways to remember:
- Empowerment Through DIY: Making your shampoo not only empowers you with knowledge about what goes into your hair care products but also allows for a personalized approach to hair health.
- Natural Hair Care at Your Fingertips: Embrace the benefits of natural ingredients. With its rich properties, castor oil offers a gentle yet effective alternative to commercial hair care products.
- Eco-Friendly Choice: By opting for homemade shampoo, you make an eco-conscious decision that benefits your hair and the planet.
- Cost-Effective and Creative: Creating your shampoo can be wallet-friendly and creative, offering a satisfying experience beyond just hair care.
- Learn, Experiment, and Share: This guide is not just about following steps; it’s about learning, experimenting, and sharing your experiences with a community that values natural and healthy living.
- Stay Updated and Engaged: Hair care is an evolving journey. Stay engaged with the latest natural hair care trends and share your insights with others.
Remember, transitioning to homemade hair care products like castor oil shampoo is a step towards a healthier lifestyle for you and the environment. Enjoy creating, using, and perfecting your hair care routine!

Beauty enthusiast, mom on-the-go, and coffee addict (not necessarily in that order!). When she’s not chasing after her adorable toddler, Victoria is busy researching the latest beauty trends, testing out products, and sharing her discoveries with the world. Join her on this journey of self-care, empowerment, and finding your own unique spark of beauty!